Mission Statement
Our mission is to provide people the ability and instructions to safely and properly slide around on the snow with Lenz Sport Type 2 Ski Bikes. Ski biking is low impact and easy to learn in as little as 2 runs! We strive to give the best ski bike rental service the state of Colorado has to offer from the longest-running ski bike manufacturer of Type 2 ski bikes! For Rentals or Demonstrations we’re the one-stop-shop for all your Type 2 Ski Bike needs!
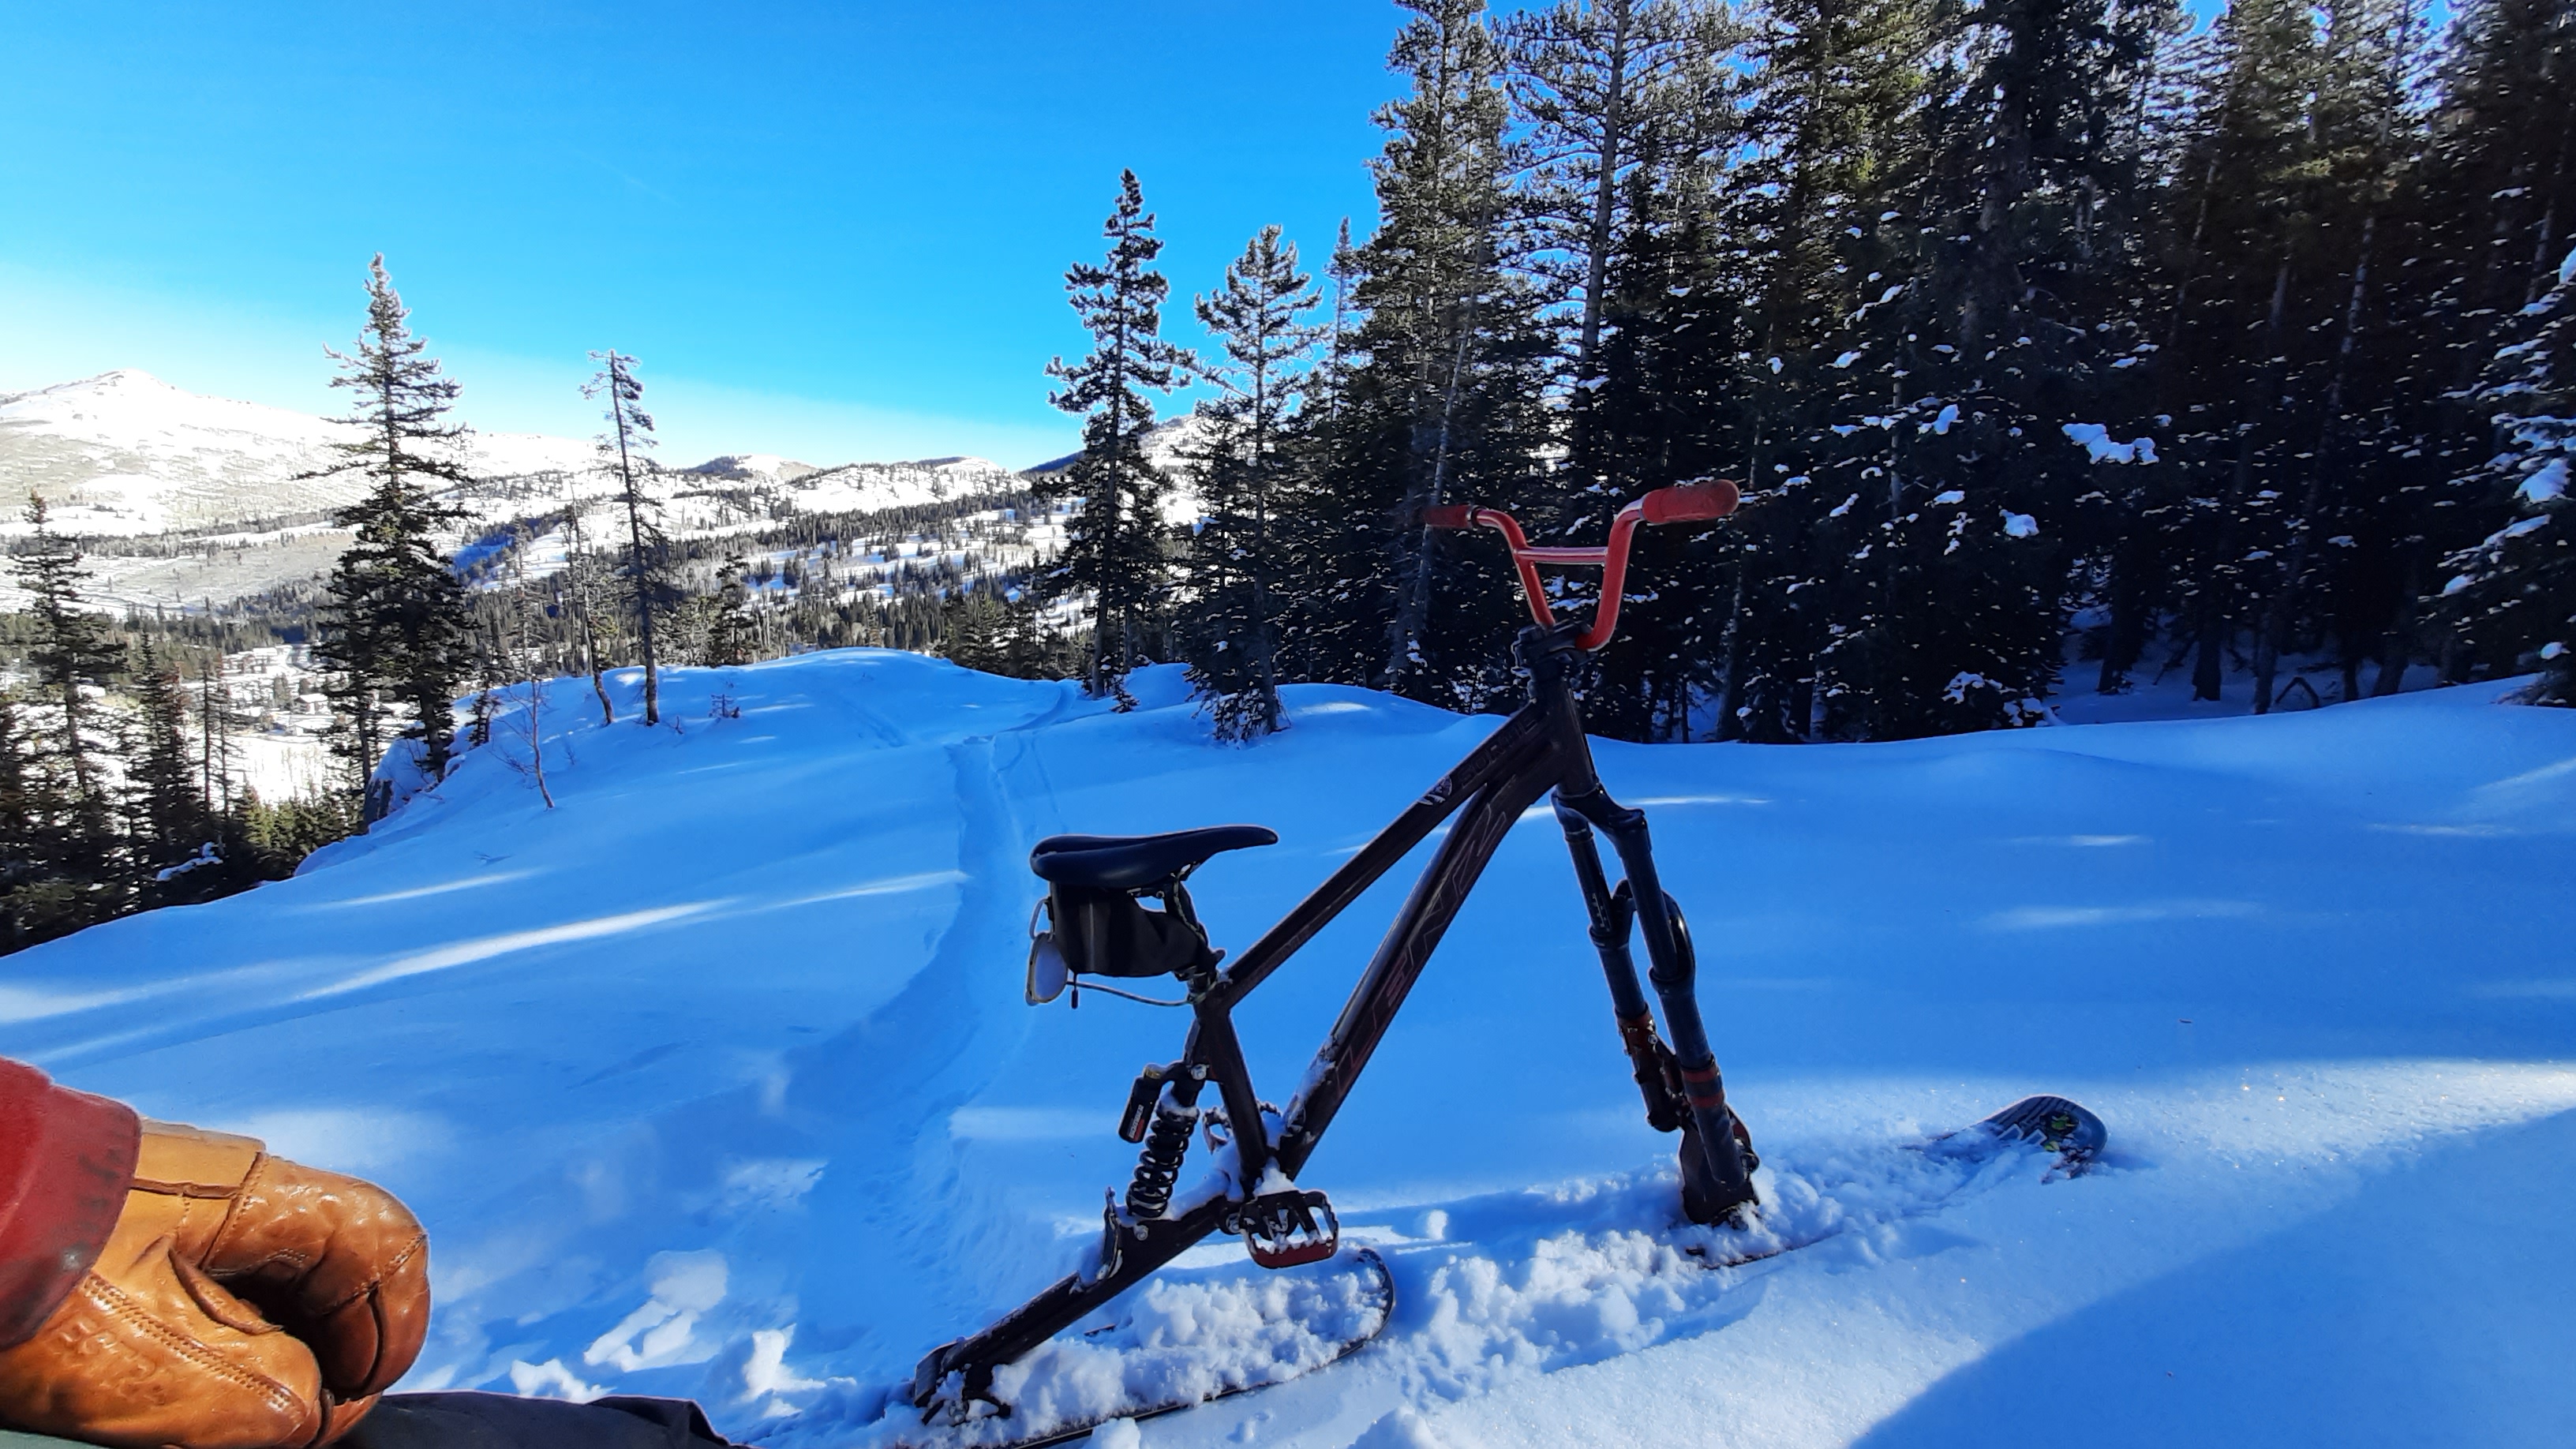
Bike Information
We supply Lenz Sport Performance Ski Bikes. Full suspension Type 2 Ski Bikes. We supply 2 different models (Recon & Sortie), in 3 different sizes. (SM, MD, LG) More Info such as Description, Components, and Geometry in the links below:
Recon
- 160-180mm fork travel options
- Handmade Lightweight Aluminum frame
- 170mm rear travel
- Proprietary Lenz Sport SecuREST system for chairlift loading
- Rear Shock Spec: 7.5 x 2.0″ with 25.4 x 8mm mounting hardware
- Lenz Sport Knuckle Head Ski Retention System
- 30.9mm seat post diameter
- 44mm ID headtube
- Lenz Sport Whopper Pegs
- Conniption Stix Skis included with the bike (upgrades available)
Sortie
- 140-160mm fork travel options
- Handmade Lightweight Aluminum frame
- 170mm rear travel
- Proprietary Lenz Sport SecuREST system for chairlift loading
- Rear Shock Spec: 7.5 x 2.0″ with 25.4 x 8mm mounting hardware
- Lenz Sport Knuckle Head Ski Retention System
- 30.9mm seat post diameter
- 44mm ID headtube
- Lenz Sport Whopper Pegs
- Conniption Stix Skis included with the bike (upgrades available)
Products / Services
- Rental: $150
- Multi-day rental: $125 / day
- Demo: $100 - 4 to 5 runs of instruction on how to ride.
-
Delivery: $150 for 1st bike, $25 per additional bike
Within 1 hour of Empire - **traffic and weather dependant**Covers drop off and pick up
Booking
FAQs
- What are ski bikes and the different types?
- A ski bike is a bike frame with skis on it, whether it's a modified traditional bike frame or a purpose-built frame for snow. Ski Bikes are bicycle-like devices engineered with skis instead of wheels to use the force of gravity to descend the slopes.
Type 1
: The original look and design from the European originators of the sport. Also known in the 60s and 70s as a Skibob, this type of SkiBike has a low center of gravity and is designed to be ridden sitting down. It is generally used with foot skis for additional balance & edging.Type 2
: Freestyle SkiBikes are a newer style that has emerged from the North American market that resembles Mountain Bikes. They are most often ridden without foot skis, with a downhill Mountain Bike inspired riding technique. Like Mountain Bikes, Freestyle bikes can be ridden either standing up or sitting down and have footpegs or footrests. Many models have fully adjustable front and rear suspensions.Type 3
: 3-Ski SkiBikes is a trike design that has recently emerged in popularity. They use three skis in their design. One ski is forward connected to the steering handlebars while the rider stands on the rear two skis. They are ridden standing up and usually have front suspension.
- How Do People Get Into Skibiking?
- There are many reasons people get into ski biking whether it's a previous injury, curiosity about the sport, or the urge to try something new. Ski biking is a great way to get out on the slopes with the lowest impact on your body.
- Is it Like Riding a Mountain Bike?
- Yes and No. At first, when learning how to ride a Type 2 ski bike the basic progressions are very different from mountain biking like body position, weight transfer slowing and stopping, and the way you contact the ground (edges vs. tires)
- Once you have learned the basic progressions of how to slow down and stop by using your edges you can start to apply mountain bike riding style and look at the mountain more like a bike trail when riding.
- How Hard is it to Learn?
- Type 2 Ski Biking is relatively easy to learn, on average most people are riding safely and confidently in 2-4 runs on Green (beginner) and Blue (intermediate) runs.
- Basic knowledge of edge control on snow and how you use that to slow and stop yourself is done with 3 easy progressions: Skidded Traverse, Garland Turns, and a 1 Turn Stop. Once you've mastered those you're riding a ski bike!
- Where can we go/ what are the rules?
- Arapahoe Basin, Beaver Creek, Breckinridge, Copper, Echo, Eldora, Grandby Ranch, Keystone, Vail, & Winter Park all allow Type 2 ski bikes.
- KNOW THE RESPONSIBILITY CODE : Know The Code
- KNOW THE COLORADO SKI SAFETY ACT
- Most places count the bikes as an additional person on the chair, for example on a 4 chair you would count as 2 and could load 2 other people with you.
- Most places require a leash which is a tether device to attach to either yourself or the chairlift while on the chairlift.
- Some places do not allow ski bikes in the Terrain Park we recommend checking with the mountain you're visiting
- You are able to ride Groomers, Moguls, Trees, Powder, Steeps, Bowls, and any other terrain you choose within your ability level.
- ** RULES VARY AT EACH RESORT/S WE RECOMMEND CHECKING WITH THE RESORT YOU PLAN TO ATTEND AS TO WHAT THEY DO AND DON'T REQUIRE**
- Detailed info at: https://americanskibike.com/where-to-ride
- Where do we pick up?
- Pick up location is listed above along with contact info.
- What to wear?
- We recommend wearing regular snow gear such as; a jacket, snow pants, gloves, helmet, and any footwear that keeps your feet dry and warm.
- ** A full-face helmet is highly recommended instead of a half shell for facial protection but is not required**.
- How to load/unload the lift?
- It is easier than you think! SkiBikes are not as heavy as mountain bikes. Depending on the style of bike, you carry the bike on the chairlift with you. Manufacturers have specific recommendations, but with most, you simply rest it either on your lap or at your side. You get in the lift line as normal and approach and exit the chair on foot or with foot skis as you would skiing. Always check with the ski area and manufacturer for their specific loading guidelines.
- The first step to loading the lift with a Type 2 ski bike is to figure out which side of your body is strongest and can hold about 30 lbs, the bike will stay on that side of your body while getting your ticket scanned, loading and unloading.
- At most resorts, you have a wireless scanning ticket that works with RFID meaning you don't have to present your ticket for it scanned. Simply walk up to the lift with the bike on your preferred side and when the turn tyle opens, slightly turn your handlebars and walkthrough.
- When loading the lift it is crucial to hold the top tube of your bike for the most secure way to load. As you walk up to the load line when the chair comes around firmly seat yourself on the chair while holding the top tube of the bike, bike still on the ground. The chair will run into the rubber strap (Secrurest) and begin to push you forward. Once you have become airborne or are past the loading area you will pivot the bike 90 degrees back up and onto the chair so that the full weight of the bike is sitting on the chair. You will want the seat of the bike up against the backrest of the chairlift. Typically the handlebars will be just behind your head.
- ** WITH THIS LOADING METHOD THE SAFETY BAR WILL NOT BE ABLE TO COME DOWN, I ALWAYS RECOMMEND ASKING ANYONE PLANNING TO RIDE WITH YOU IF THEY'RE OK WITH IT.**
- Riding dynamics (body position, how to brake/stop, what can you ride)
- Body position is similar to that of mountain biking, we use the term “attack position”. The key difference is you will want to have more weight on the front ski so that you have edge control to initiate turns and control your speed. Back Seat = Bad time
- Stopping and controlling your speed is very similar to that of skis or snowboards where you have to use the edges of your skis to sideslip or do a skidded traverse. This is done by leaning the bike downhill to get the skis flat so you're able to disengage your edges and achieve a sideslip or skidded traverse.
- A key difference between ski biking and mountain biking is where you weigh your hands and feet. For example, when you go to make a right turn you would weigh your right hand and foot to help initiate your turn along with steering slightly until your edge has engaged
- Do you ride Sitting or Standing?
- Traditionally on a Type 2 ski bike, you will be standing while riding as you would on a Downhill Mountain Bike however, you can sit down and still ride adequately it just requires slightly more effort. The key differences between sitting and standing on a Type 2 ski bike are where your weight is and how that affects the responsiveness of turning and edging.
-
Is it a regular Mountain Bike Frame?
- Lenz Sport makes purpose-built Type 2 Ski Bikes, meaning the design was built for use on snow and loading a chairlift. The difference between a converted mountain bike frame and a ski bike frame is going to be geometry and headtube angle. Riding on snow vs. dirt is two different worlds, with ski biking you're able to ride the fall line more frequently, therefore, the head tube angle is more aggressive whereas on a mountain bike you're confined to a trail most of the time.
- Detailed info: https://lenzsport.com/ski-bikes/